Session timeout warning
You session will expire soon.
Do you want to extend your session?
Time left
This guide shows the process of enabling Cookies in Google Chrome.
Note: These screenshots are taken in Chrome on Windows but the process is identical on Mac and Linux computers.
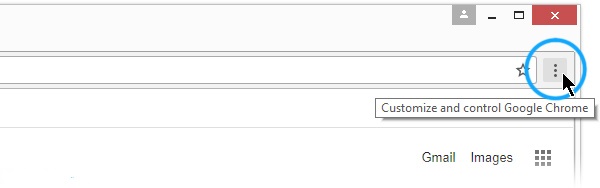
This will reveal a menu with options. One of them will be named "Settings".
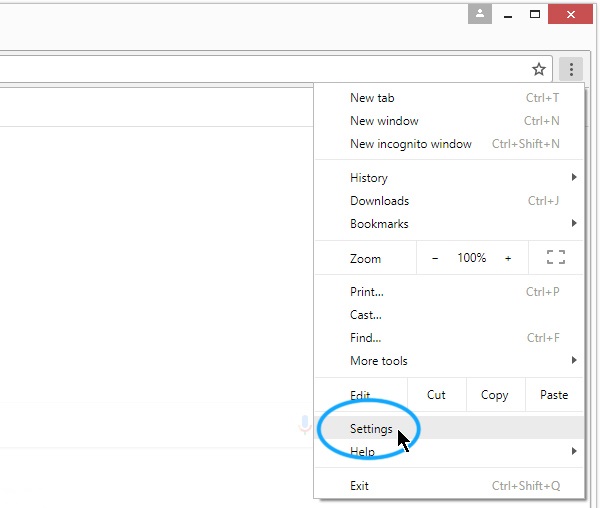
The Settings screen will now appear.
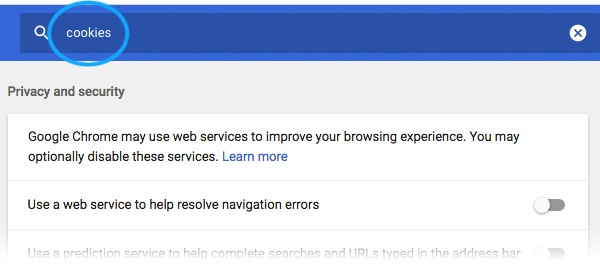
The main interface for Chrome's settings will appear, with a dark blue search box at the very top. (If you only see the magnifying glass icon, either click it or drag your browser window a bit wider to make the search box appear).
Type the word "cookies" into the search box.
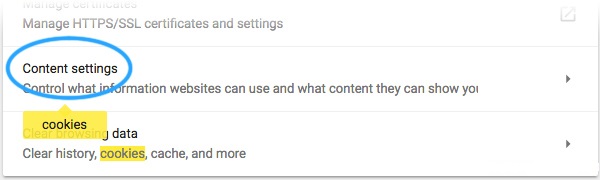
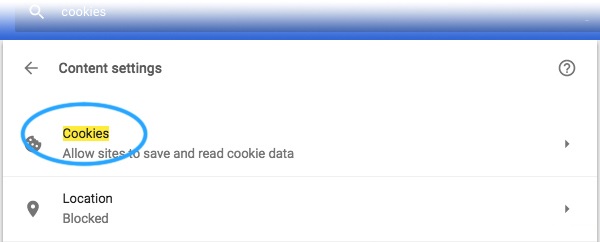
After typing "cookies" in the search, there will be multiple options listed. Scroll down to the bottom of the settings screen and click the section named Content settings.
Click the "Cookies" option to see the settings.
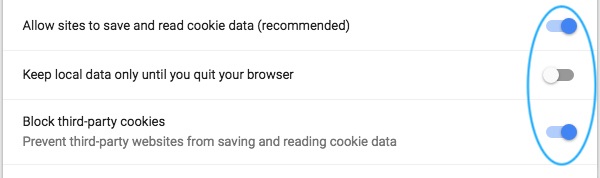
Select the first option "Allow sites to save and read cookie data (recommended)". This will allow the Portal to store cookies.
The new settings will take effect immediately. Close the Settings tab and resume browsing


The English Access Scholarship Program is sponsored by the U.S. Department of State with funding provided by the U.S. Government and administered by FHI 360.